
How to Use the App
GENBA-EXCEL
[GENBA-EXCEL] is a web app designed to solve the problem of being overwhelmed by Excel work after returning to the office from fieldwork.
Work content from the field is directly reflected in Excel on the spot!
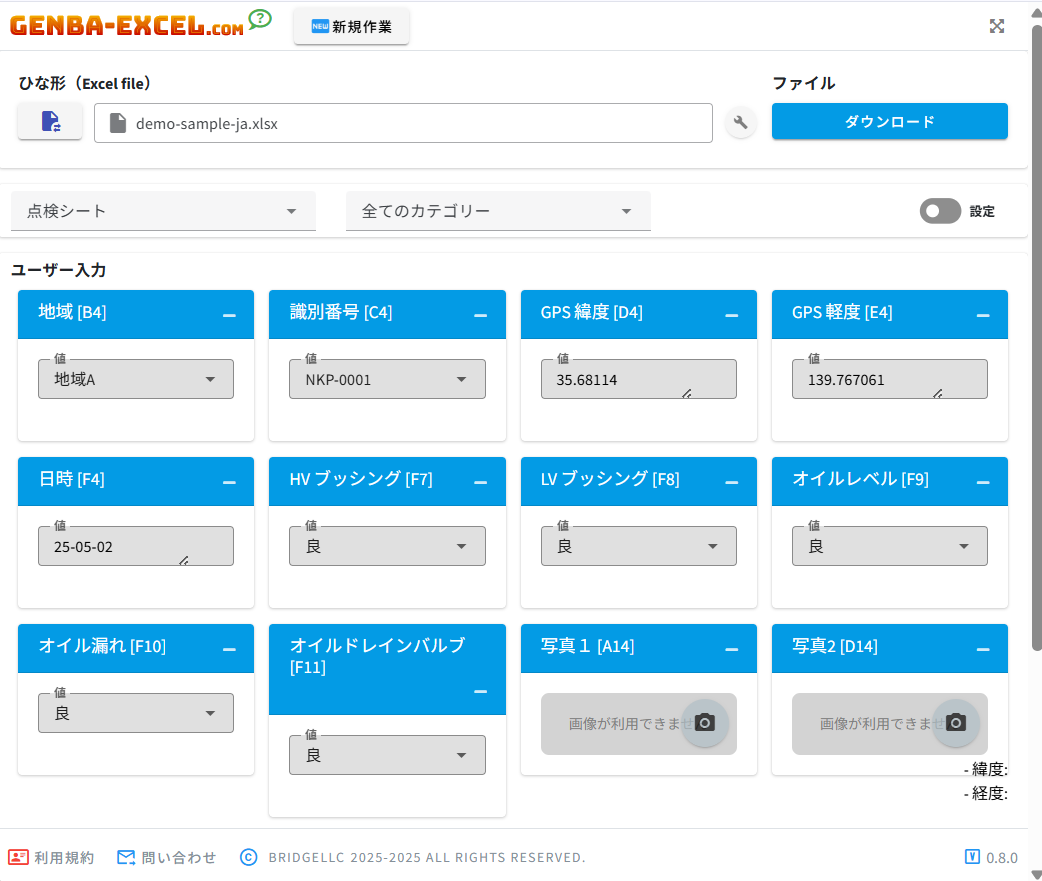
GENBA-EXCEL Interface
By simply entering inspection, test, and measurement data from a smartphone or tablet, there's no need to return to the office to compile everything.

The data entered into GENBA-EXCEL is instantly reflected in Excel.
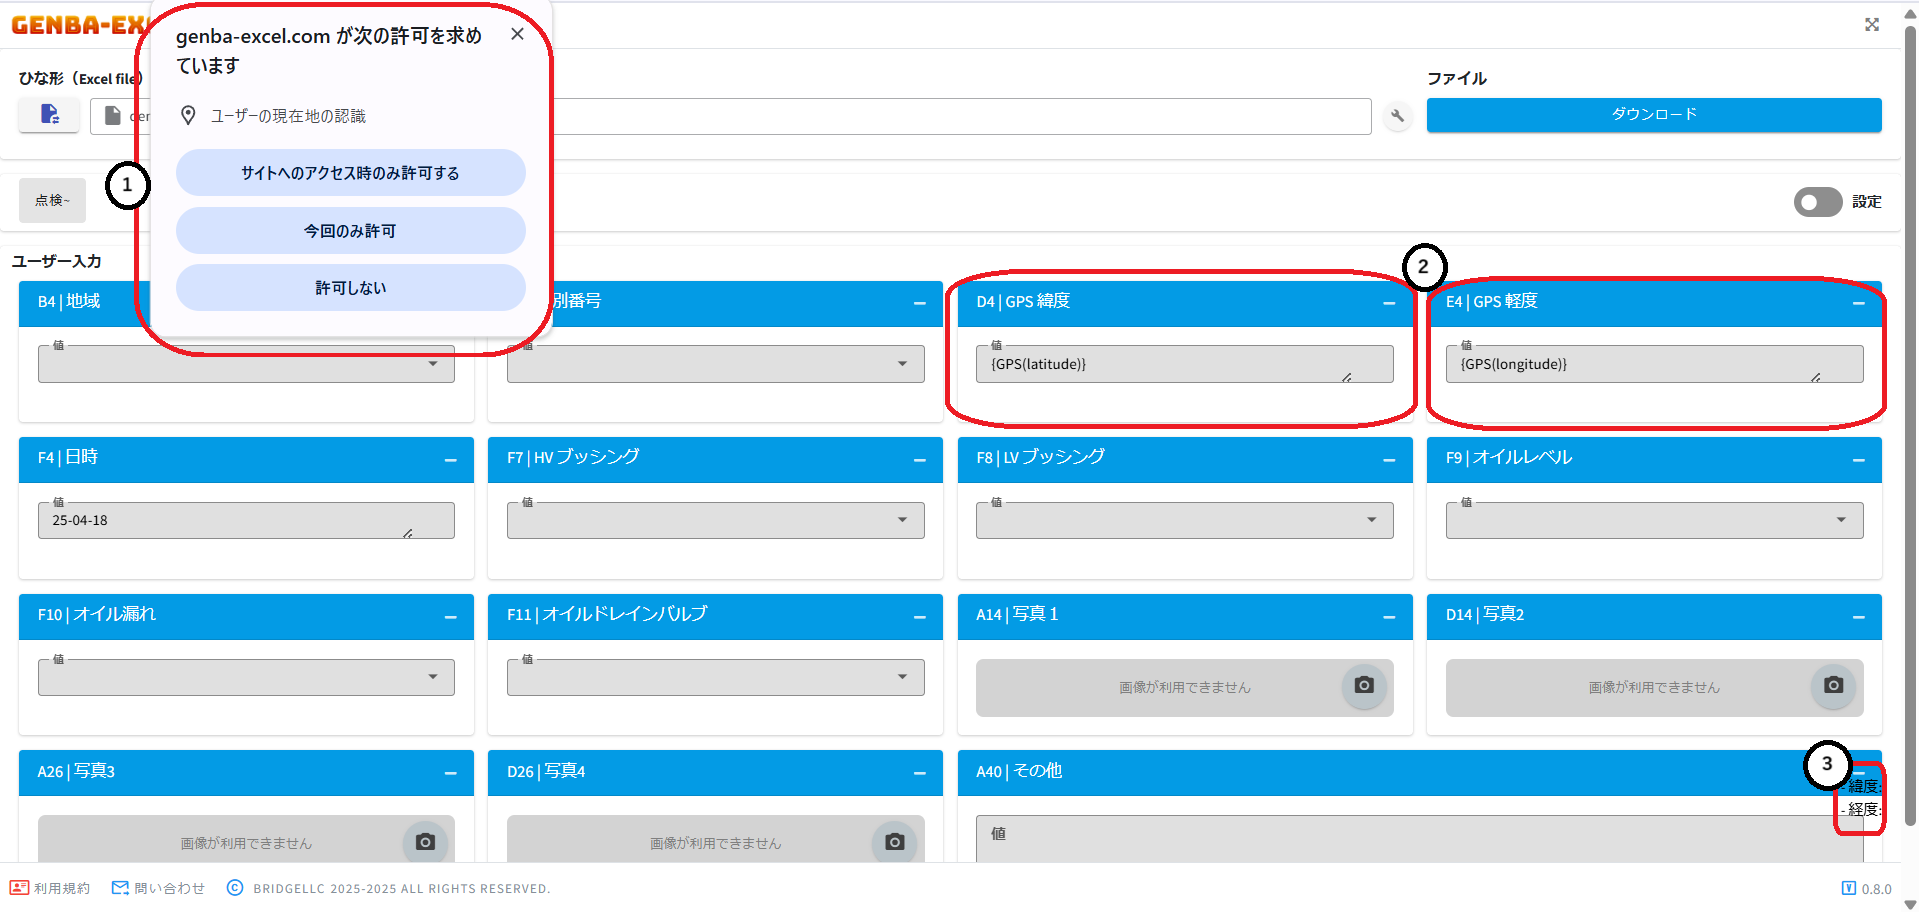
1. Manage Location Settings
When the GENBA-EXCEL screen opens,
A pop-up appears in the upper left ① asking for location access.
If your Excel includes location information and requires input, select "Allow" If not, select "Don't Allow"
If "Allow" is selected, the GPS latitude and longitude will automatically display in field ②.
You can always check the location information at field ③.
GENBA-EXCEL Home Screen
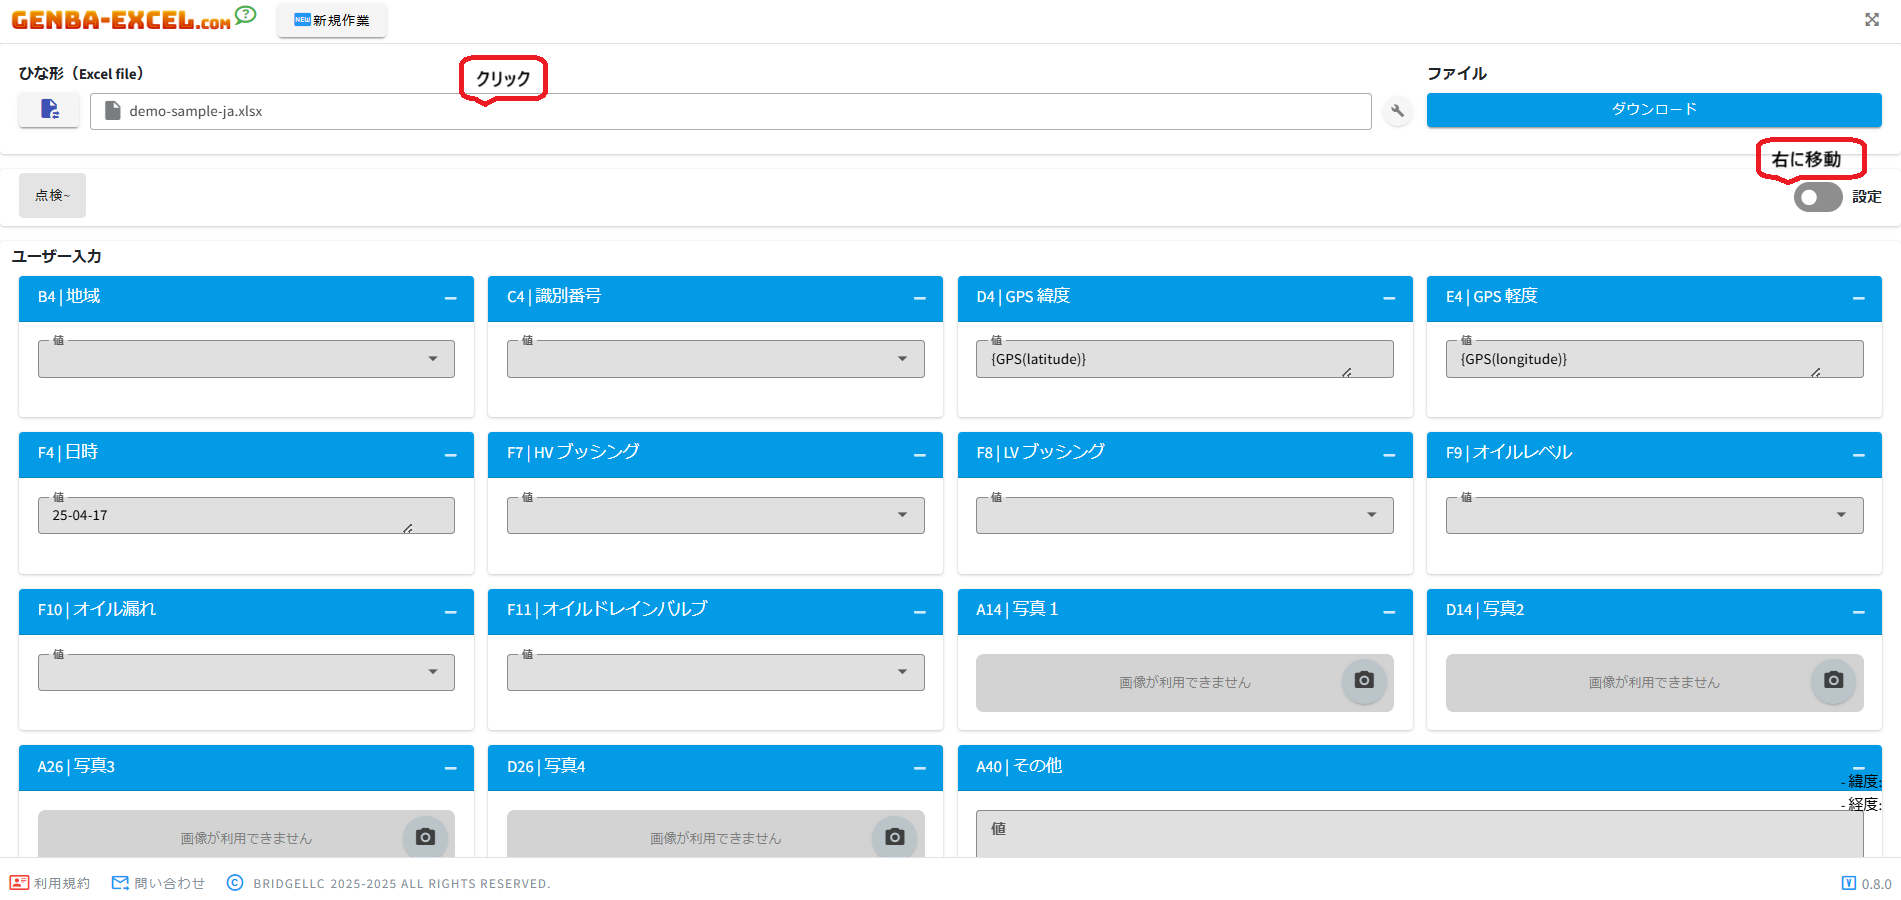
2. Register Settings
Since sample data is shown on the first launch, register the Excel file you will use for your actual work as the "Work File"
Click on the top of the screen to open a dialog, then upload the Excel file from your PC.
Once the upload is complete, click the "Settings" button at the top right to proceed.
GENBA-EXCEL Registration Settings Screen
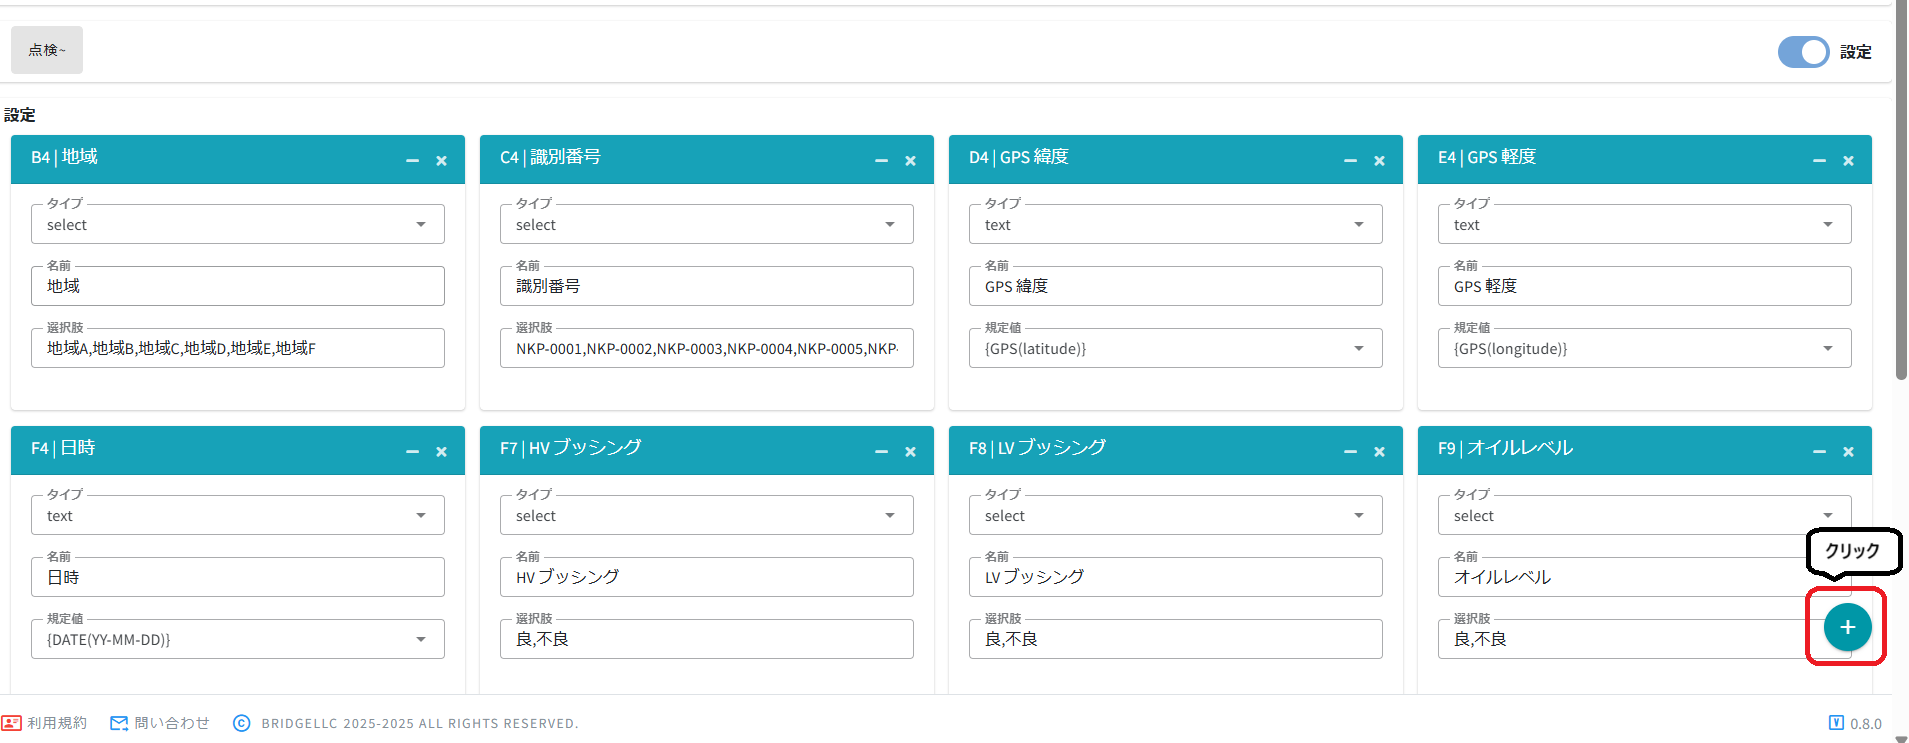
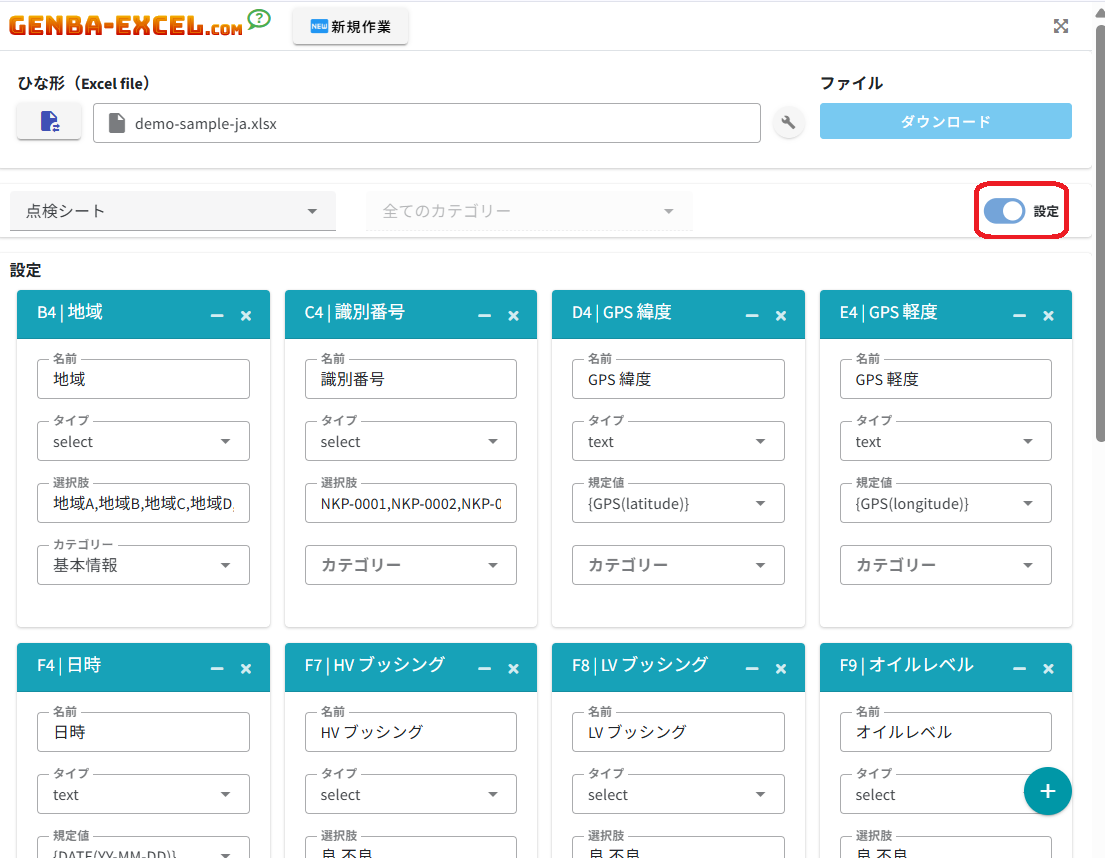
3. Settings Screen
Click the "+" icon in the lower right corner of the settings screen.
GENBA-EXCEL Settings Screen
4. Enter Basic Settings
When the "Add Item" screen appears, configure the GENBA-EXCEL input fields based on the Excel file uploaded in Step 2.
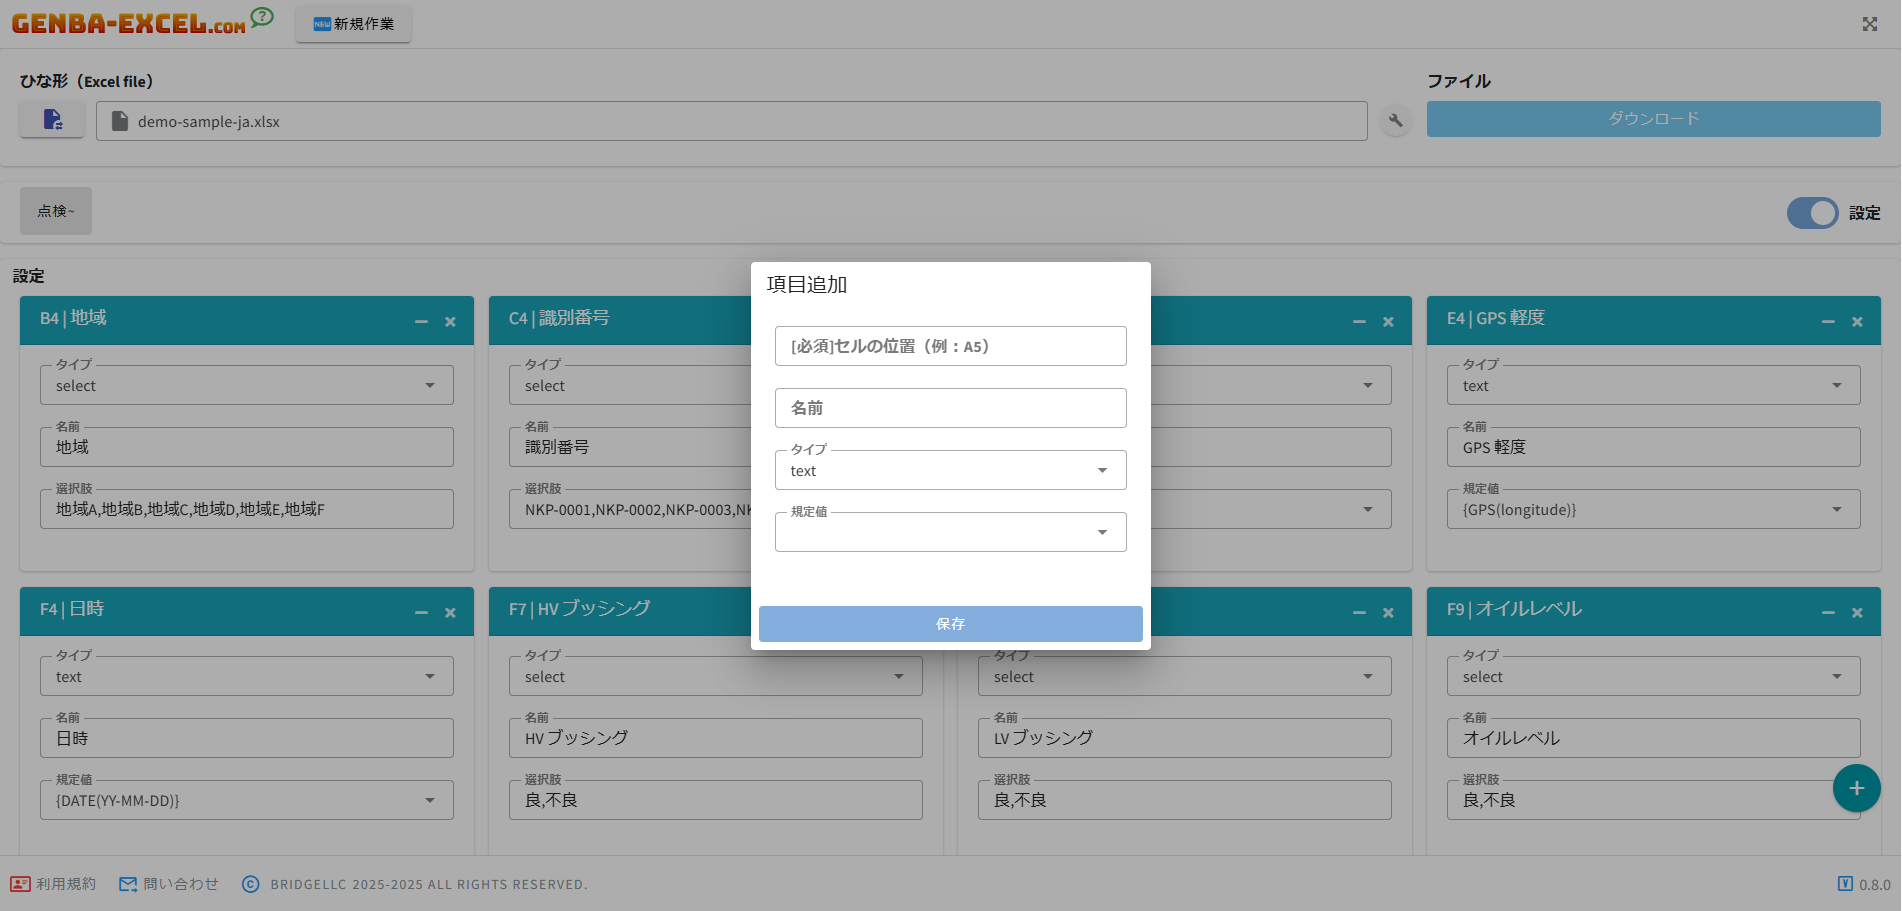
Basic Settings Input Screen
5. Input Settings for Select Options
Enter data sequentially starting from the "Cell Position" that will be auto-filled in the Excel file.
Using the sample:
Cell Position: Enter "B4" to reflect the data in the red-marked cell in the Excel sheet.
Name: Enter the field name in the Excel sheet, e.g., region name.
Type: Use "select" for dropdown selection during data entry.
Options: Enter multiple predefined region names.
Category: Set to "Basic Information" for easier data input within GENBA-EXCEL.
* Category is optional and can be left blank.
Select Options Input Settings Screen
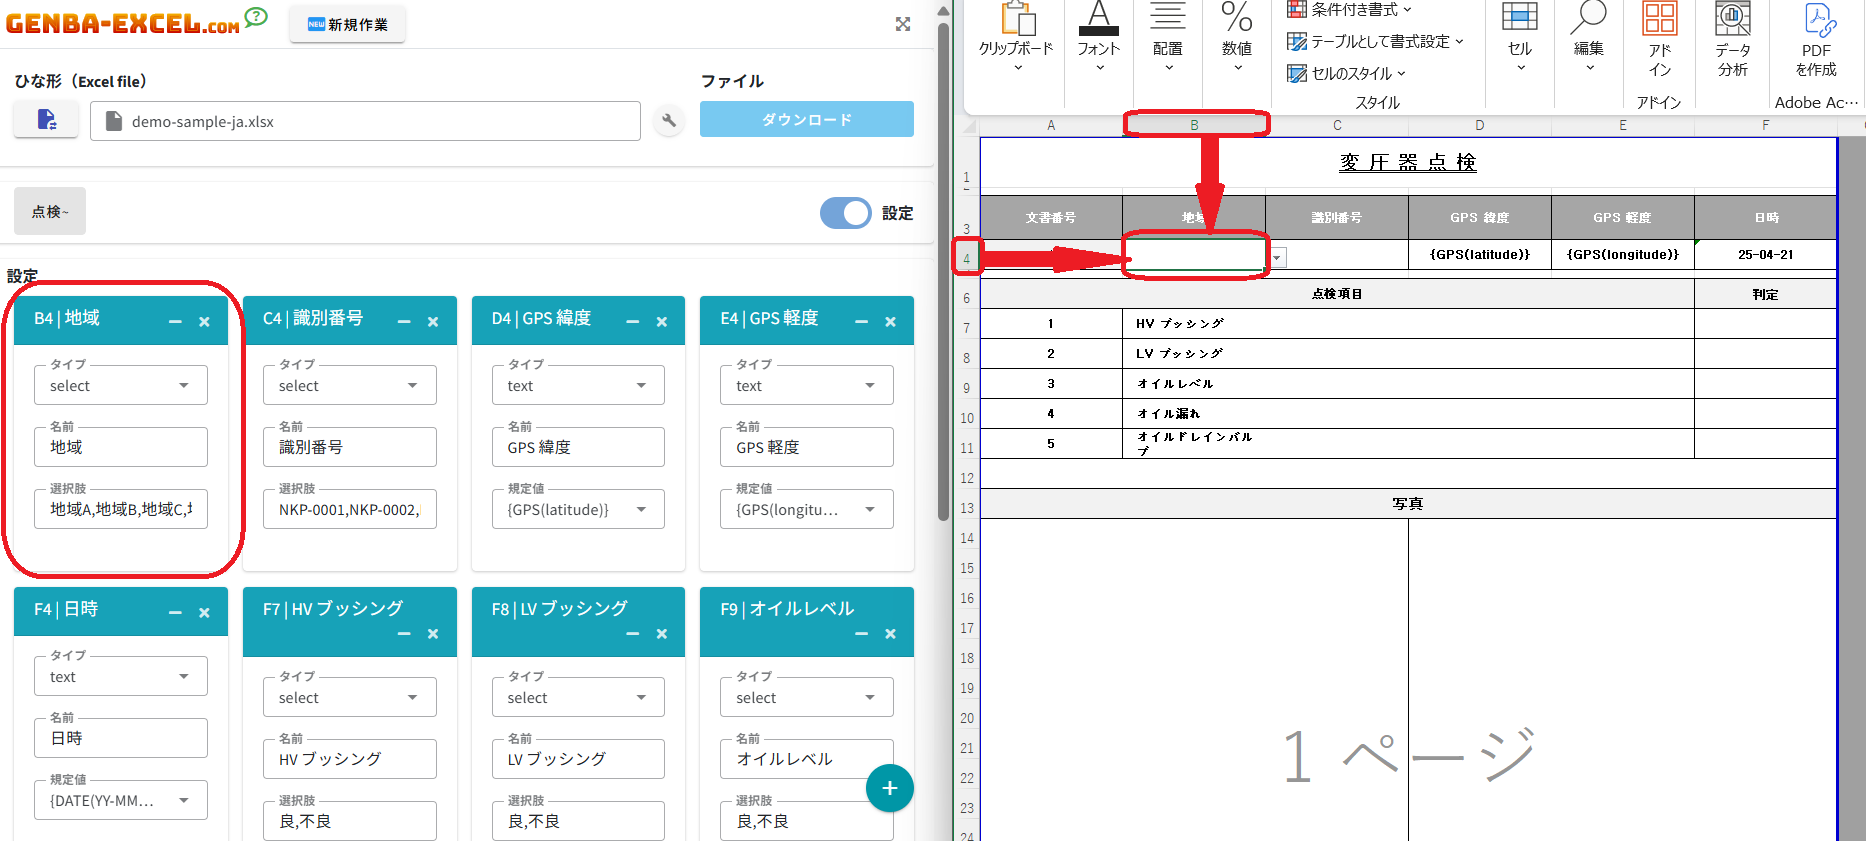
6. Location Information Input Settings
Using the sample:
Cell Position: Enter "D4" to reflect the data in the red-marked cell in the Excel sheet.
Name: Field name in the Excel data, e.g., GPS Latitude.
Type: Use "text" to input existing text.
Default Value: Use "GPS(latitude)" to automatically acquire location data.
Category: Set to "Basic Information" for efficient data input.
* For longitude, select "GPS(longitude)".
You can also manually input numeric values directly in GENBA-EXCEL.
Location Information Input Settings Screen
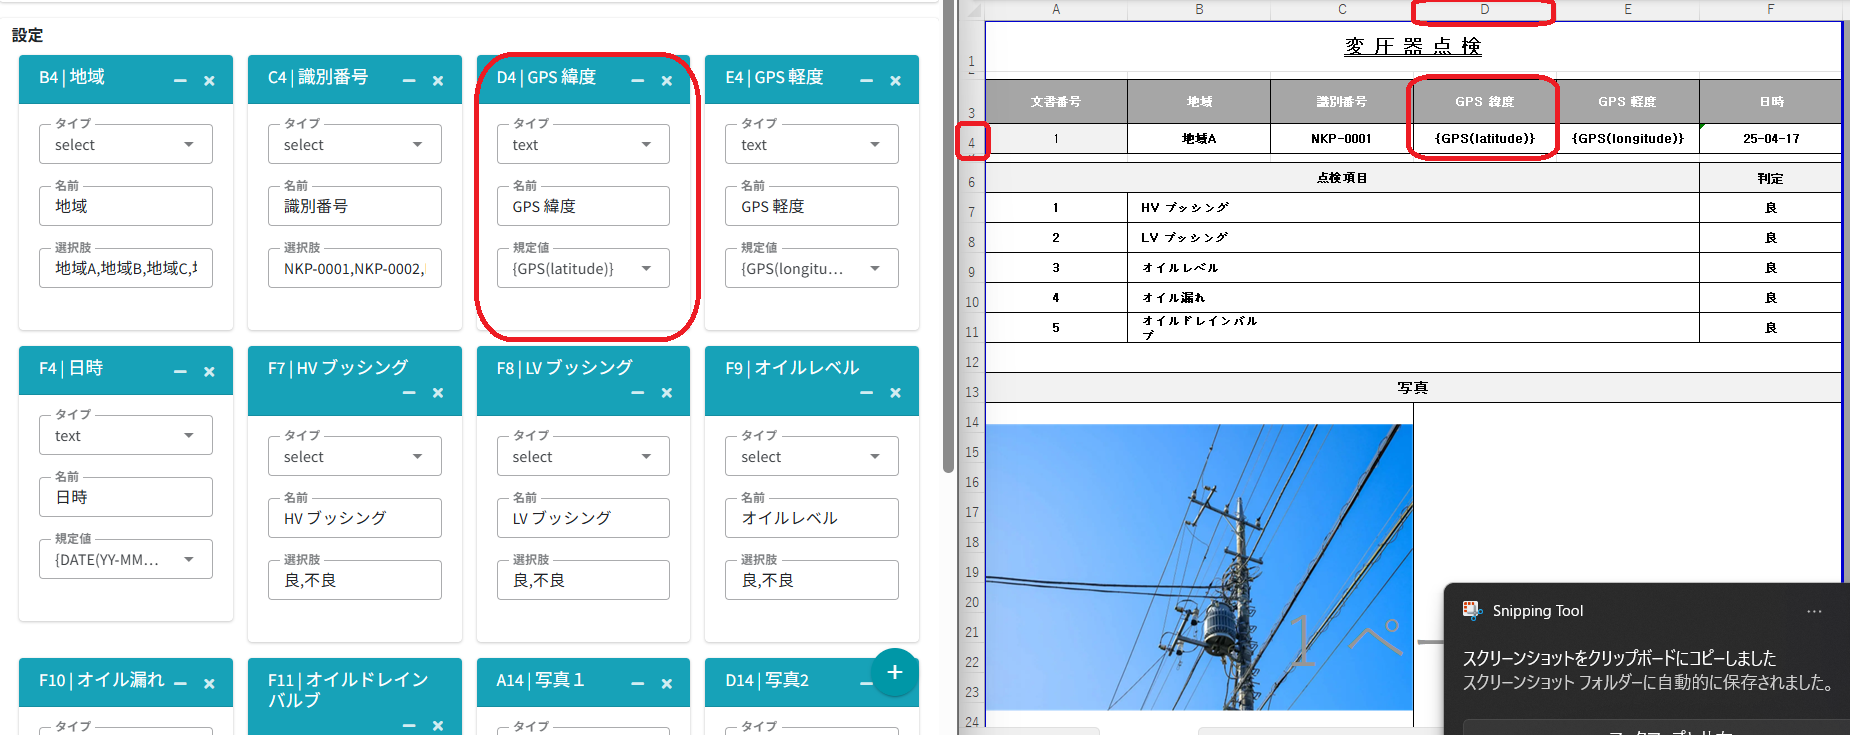
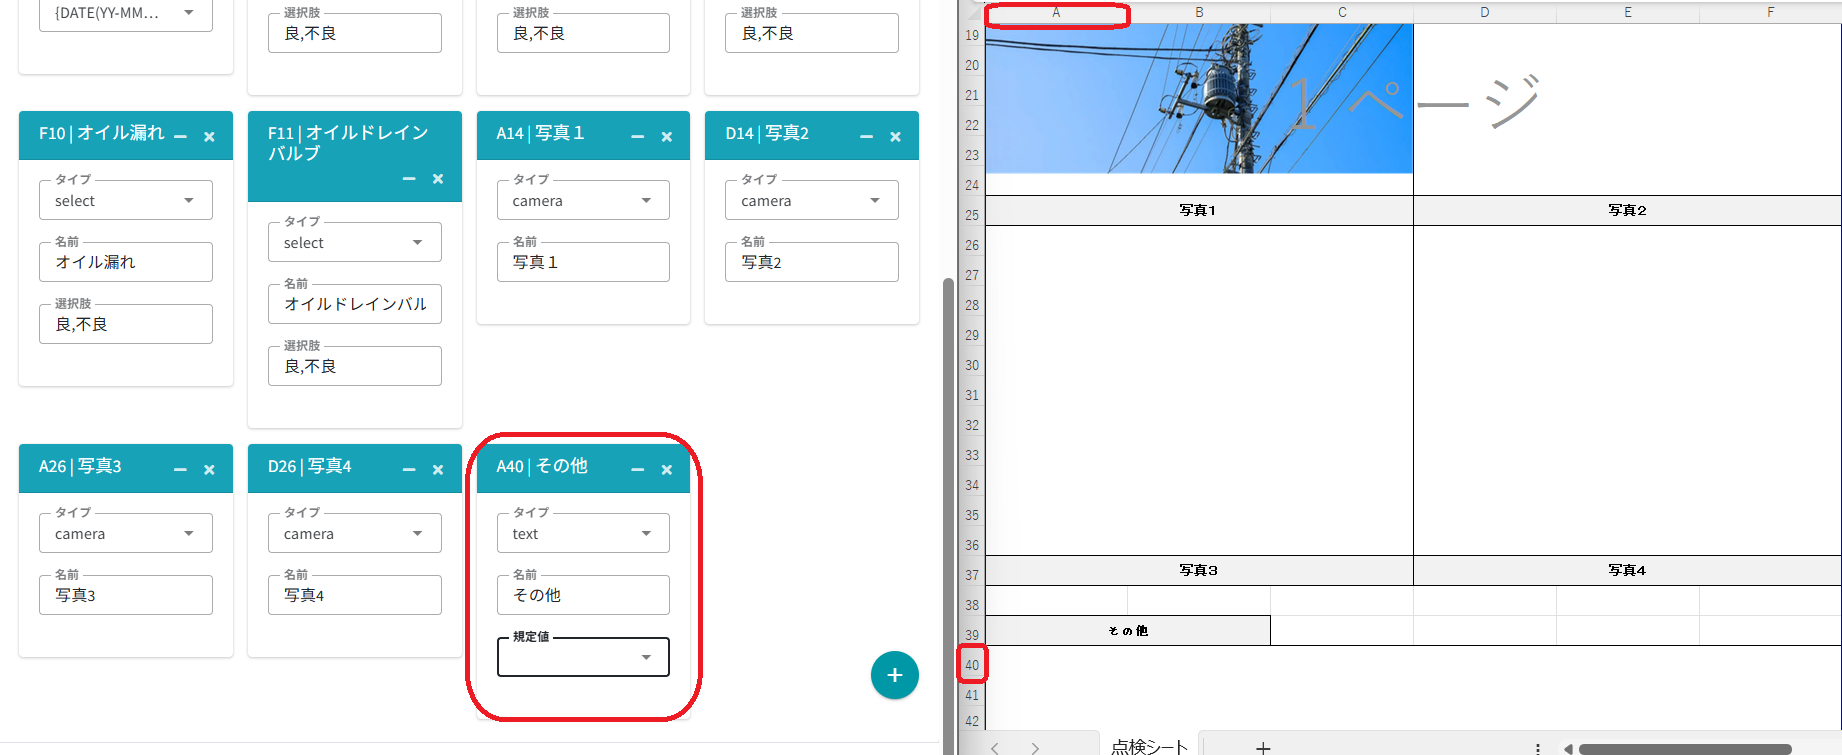
7. Photo Input Settings
Using the sample:
Cell Position: Enter "A14" to reflect the data in the red-marked cell in the Excel sheet.
Name: Field name in the Excel data, e.g., Photo 1.
Type: Use "text" to input existing text.
Category: Set to "Photo" for smoother data entry.
* Photos taken using a smartphone or tablet camera will be automatically reflected during data entry in GENBA-EXCEL.
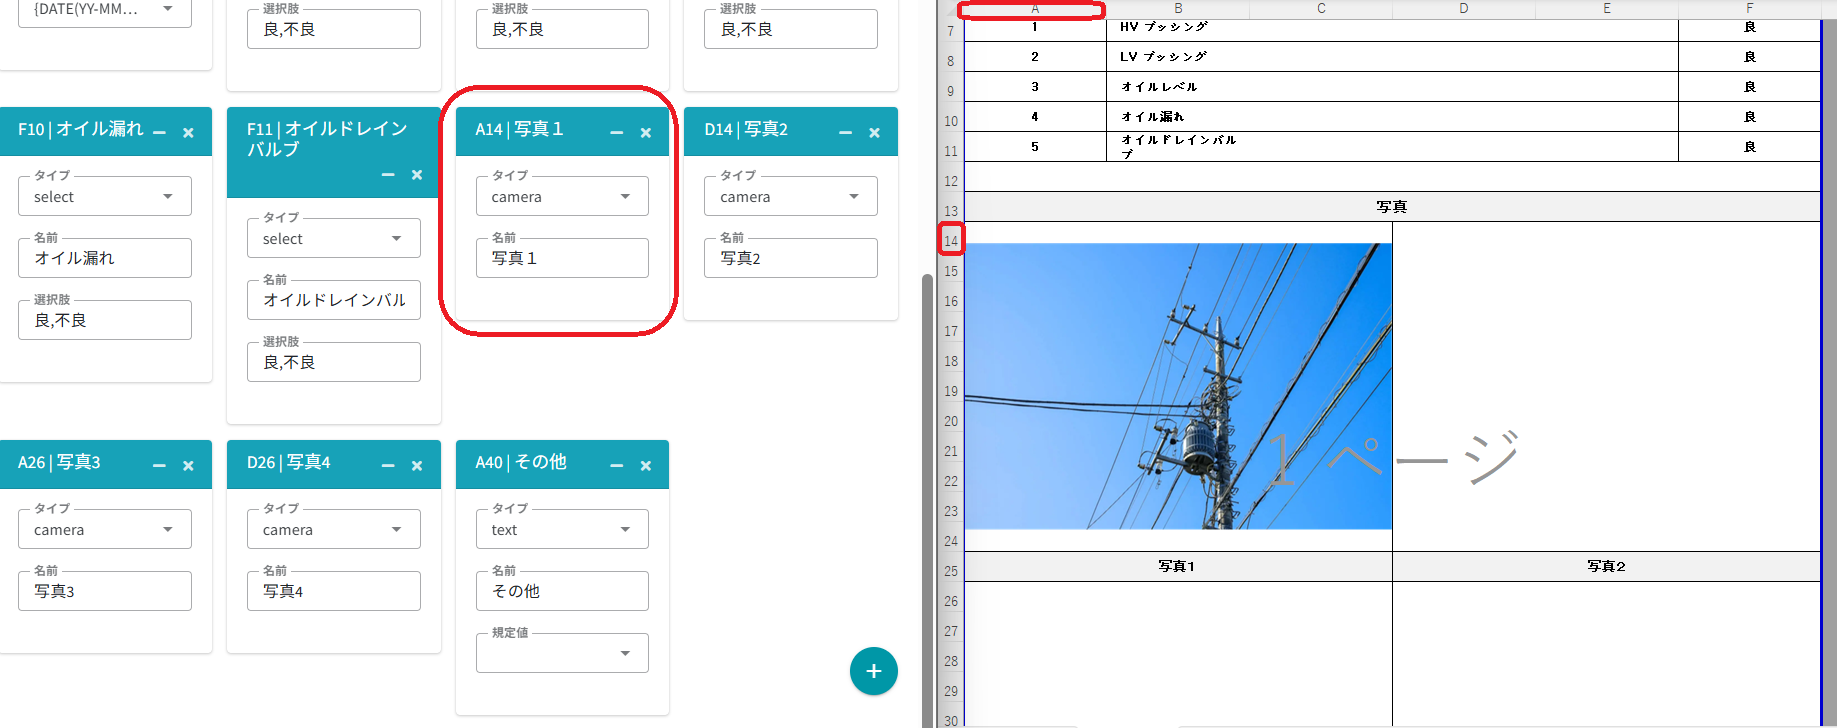
Photo Input Settings Screen
8. Other Input Settings
Using the sample:
Cell Position: Enter "A40" to reflect the data in the red-marked cell in the Excel sheet.
Name: Field name in the Excel data, e.g., Other.
Type: Use "text" to input existing text.
Default Value: No selection required.
Category: Set to "Other" for smooth data entry.
Other Input Settings Screen
9. GENBA-EXCEL Setup Completion Screen
Once you have finished entering the items you want to reflect in the Excel sheet using the GENBA-EXCEL settings screen,
click [Settings] at the top right, then go back to the left and return to the [User Input] screen to complete the GENBA-EXCEL setup.
You can immediately start using it at the worksite.
GENBA-EXCEL Setup Completion Screen
10. Exporting Data from GENBA-EXCEL to Excel
Once you have completed entering data in GENBA-EXCEL,
click [Download] in the upper right corner.
When the file is saved successfully, a message will appear indicating that the file has been saved.
Data Export Screen to Excel